
The service provided by CloudFlare CDN is one that “saves” your website content on servers that are distributed in different areas around the world.
The service connects our site to the closest available server.
In addition, the service optimizes the website’s various pages by minimizing the JavaScript code, thus giving the site an additional layer of security for the site, and all of this – for free!
- Naturally, if you want to get some extra security and personal service, there are paid versions of the service.
Getting to know Cloudflare
Cloudflare is a kind of CDN.
CDN stands for “Content Delivery Network”.

Connecting the site to Cloudflare
Following is a step-by-step guide for opening a user on Cloudflare, connecting the domain, and verifying that the connection has been completed successfully.
It’s possible that your storage server has the option of connecting to Cloudflare with one click, but the guide will go through the full process:
-
Creating a Cloudflare user
Go to the Cloudflare website and click on “Sign Up” – put in an email address and a password, and there you go, you have a user ????.
-
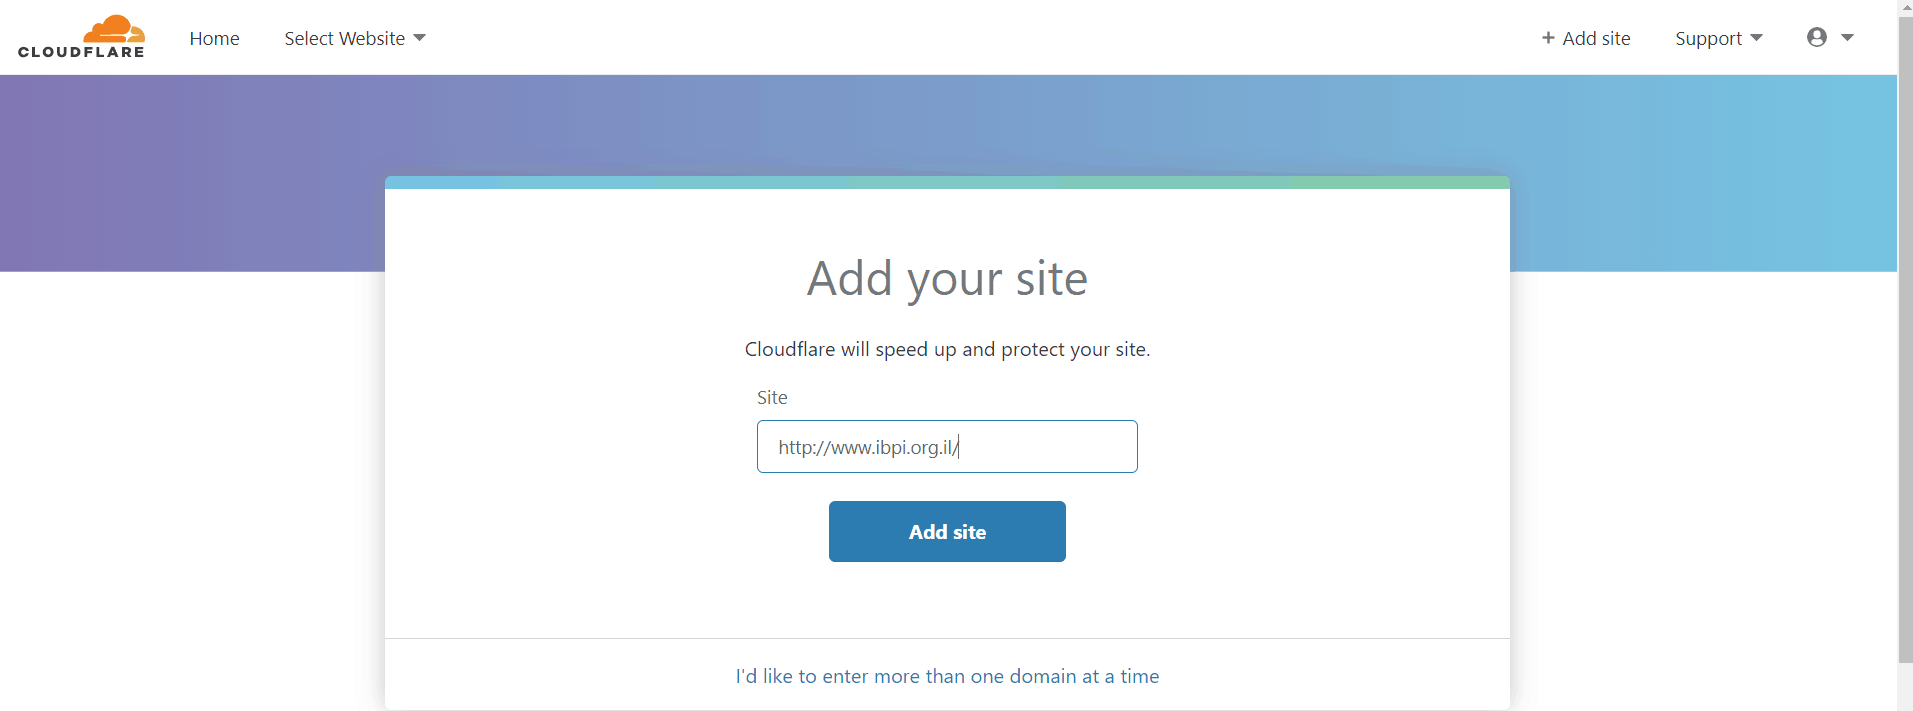
Adding a new website
If you have just signed up now, you will be automatically redirected to the “add domain” page. If not, the top menu has an “Add Site” option.
Input the website address and click on “Add”.
-
DNS record identification
The next stage is to update the DNS records for the Cloudflare servers.
Cloudflare will try to identify the existing DNS records, but you need to make sure that all of the records have been identified. Afterwards click “Next”.

-
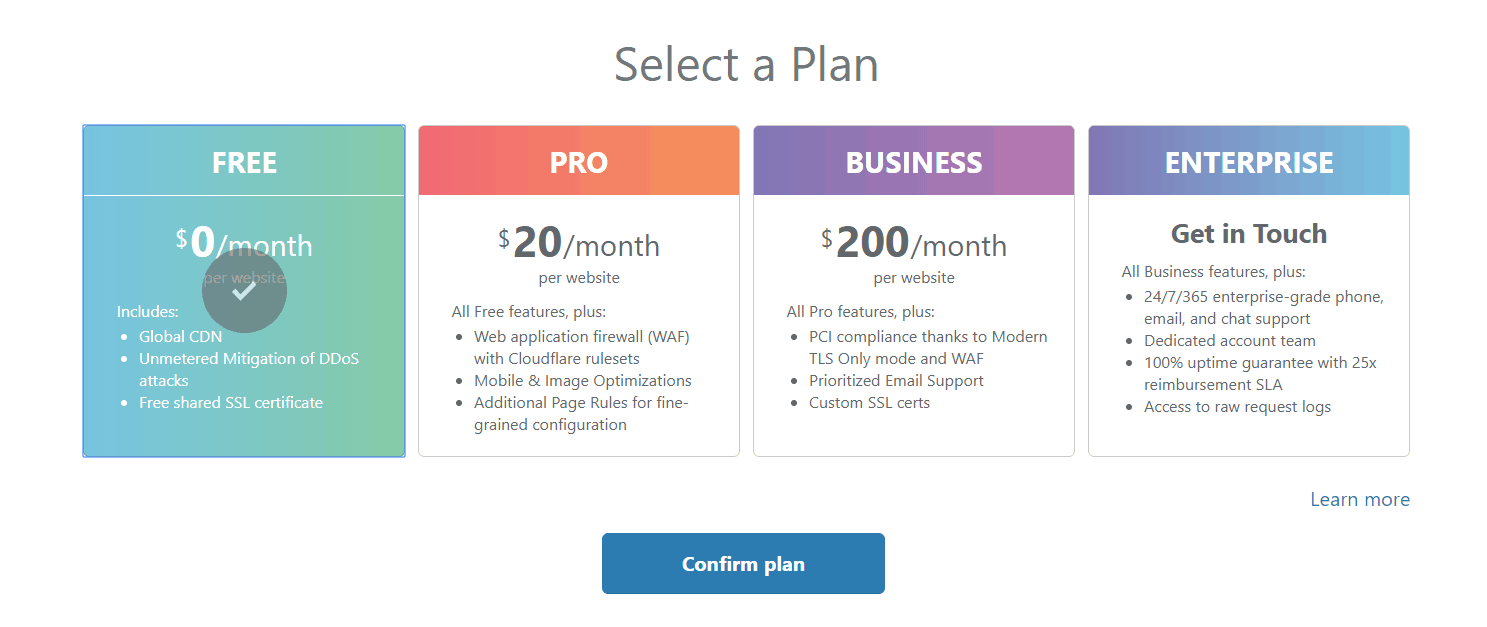
Selecting a plan
When you get to the plan selection page, select the free plan and confirm.
-
Display of the DNS records identified by Cloudflare
Cloudflare will display all of the DNS records that it has identified – most of the time there will be missing records you will have enter manually.

In order to enter the missing records, you must:
- Go to your storage server and copy all of the DNS records.
- In order to get to the DNS records in UPress, use the following path: Manages site -> settings -> manage DNS. The following page will open:

- Copy every record to Cloudflare while making sure that the Name, Type, and Value is 100% identical.
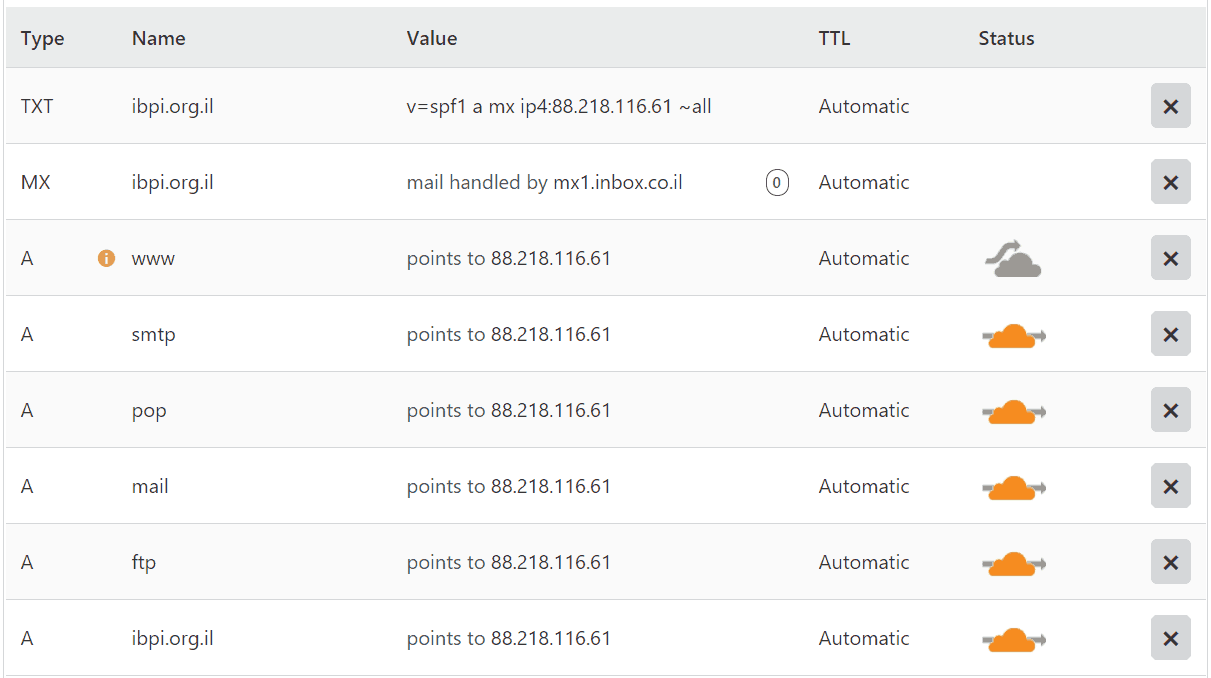
- Regarding the “Status” tab – if the cloud is gray, this means that the record will not go through Cloudflare, and if the cloud is orange, this means it will.
It’s better that all the records go through Cloudflare; a click on the gray cloud will make it turn into an orange cloud.
- This is how the final result will look, click “Continue”:

-
Changing the Nameservers
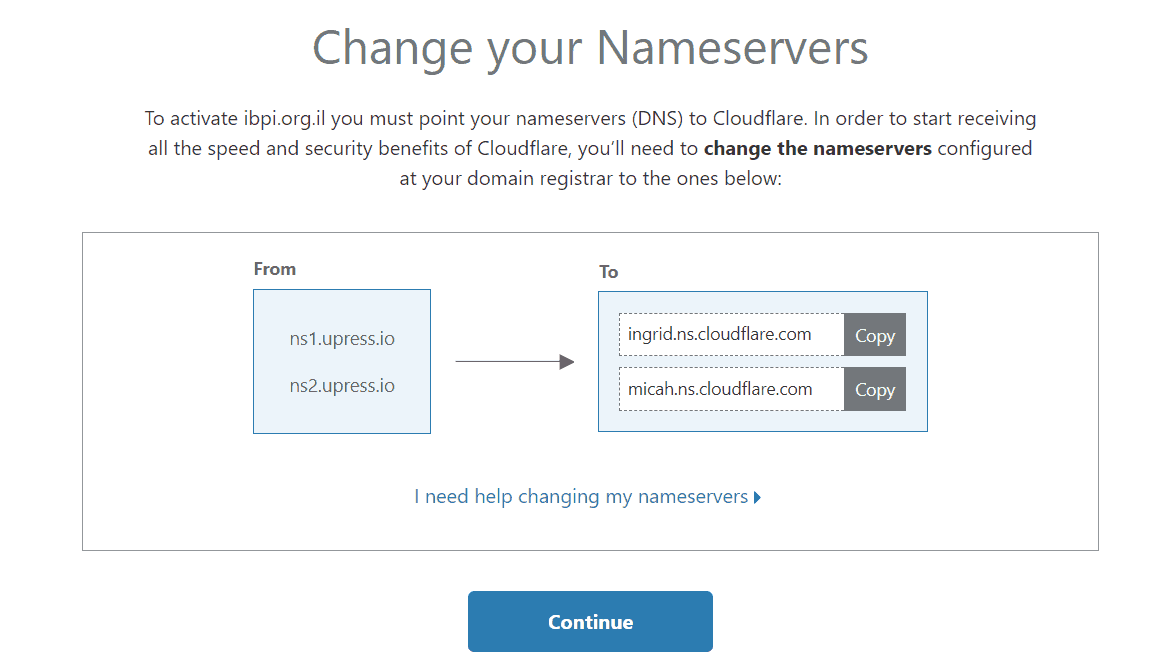
- In order to change the Nameservers to that they will redirect to the Cloudflare servers, we need to connect to the domain hosting platform (the platrom through which you purchased the domain, whether on GoDaddy, Box, or any other platform) and change the Nameservers.
- In the domain hosting platform, go to manage DNS, and update the Nameservers according to the instructions:

- Wait until the DNS records update (the time will depend on how frequently the domain system updates the records) which should take up to 24 hours.
* During the 24 hours it takes until the update is fully completed, the website may not be 100% operational. This is to be expected.
After everything updates successfully,
You’ll be able to see that Cloudflare is getting information about the website:

In Summary
Connecting a website to Cloudflare is meant to improve the website’s loading speed and security level, while contributing indirectly to a good SEO process.
We will be happy to hear about your experience using the guide.
Had success? Tell us.
Something not work properly? Write to us and we will help.
Know or need a different way to install? Share with us.
Congratulations! You have learned how to connect your site to Cloudflare, now’s the time to move on to Step 3: Installing an SSL certificate.


